


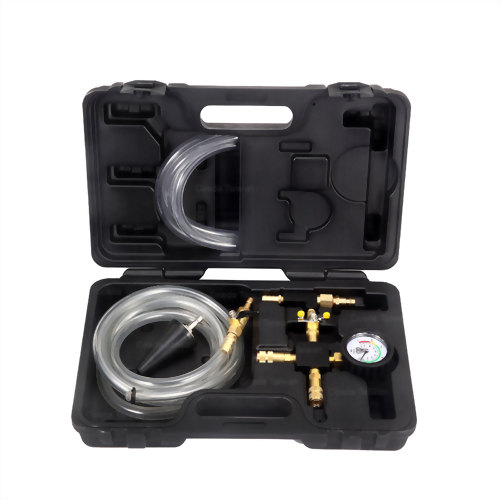
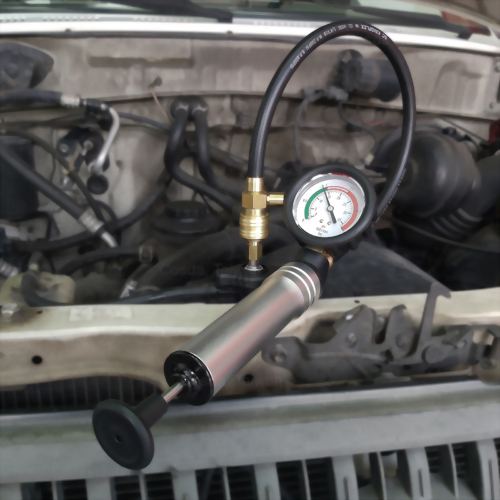
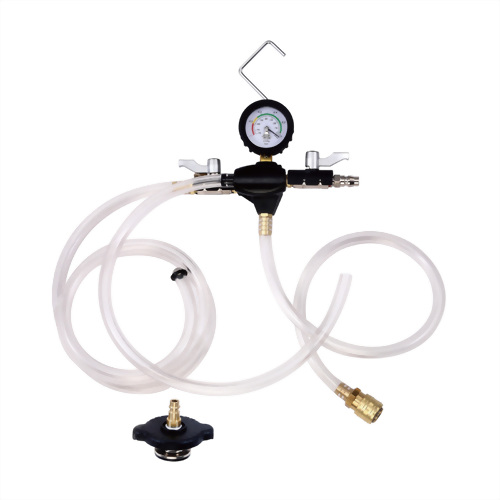
Vacuum-Type Coolant Refill Kit
• No need to undergo the time-consuming air bleeding after refilling new coolant
• Conical adapter offers a wide application to different radiator filler necks


The vacuum method for changing coolant is an efficient way to ensure that all air is removed from the cooling system, preventing air pockets that can lead to overheating. Here’s a step-by-step guide for changing coolant using the vacuum method:
Materials Needed:
- New coolant (refer to your vehicle’s owner’s manual for the correct type and amount)
- Distilled water (if you need to mix the coolant)
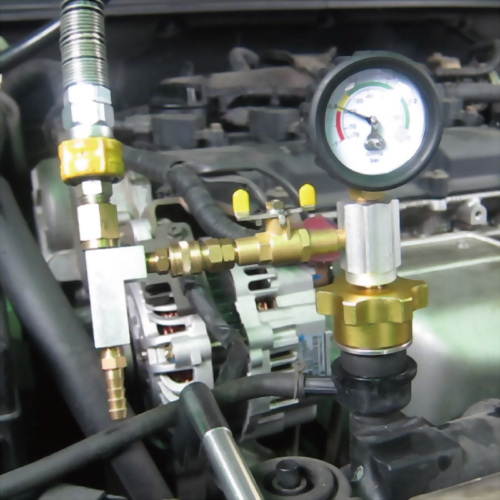
- Vacuum coolant refill tool (e.g., this Cosda SD-1014 tool)
- Air compressor
- Drain pan
- Socket set and wrenches
- Screwdrivers
- Clean rags or shop towels
- Safety glasses and gloves
Step-by-Step Guide:
1. Preparation:
- Park the Vehicle: Ensure the vehicle is on a flat, level surface. Engage the parking brake.
- Cool Down: Make sure the engine is completely cool before starting the process to avoid burns from hot coolant.
2. Drain the Old Coolant:
- Locate the Radiator Drain Plug: Refer to your vehicle’s manual to find the drain plug on the radiator.
- Place the Drain Pan: Position a drain pan underneath the drain plug.
- Open the Drain Plug: Remove the drain plug and allow the old coolant to drain out completely. You may also need to remove the radiator cap to allow for faster draining.
- Drain the Engine Block: Some vehicles have a drain plug on the engine block. Remove this plug to ensure all the old coolant is drained.
3. Flush the Cooling System (Optional but Recommended, please check Cosda’s SD-1290):
- Flush with Water: Reinstall the drain plugs and fill the cooling system with distilled water. Run the engine with the heater on high until it reaches operating temperature, then allow it to cool and drain the water.
- Repeat if Necessary: Repeat the flushing process until the water drains clear.
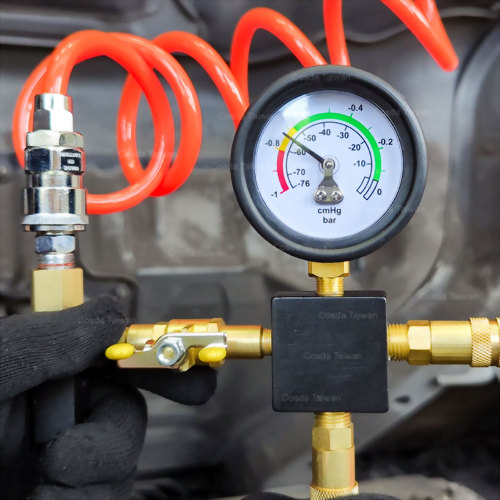
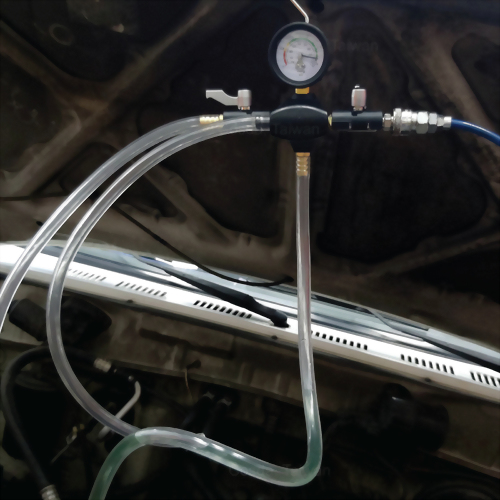
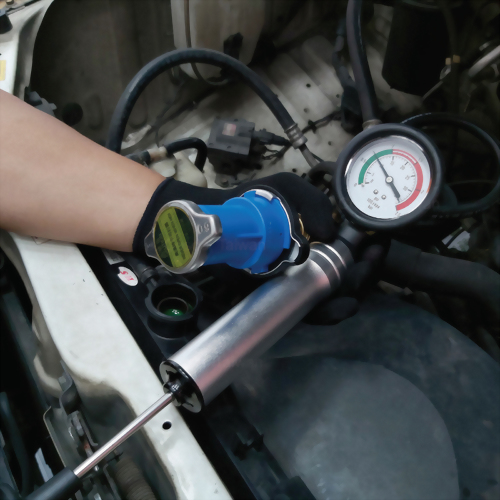
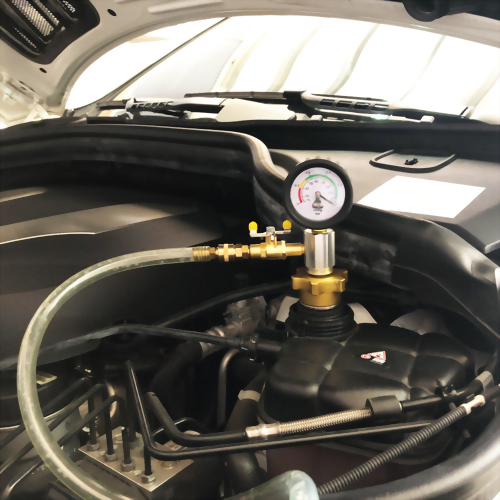
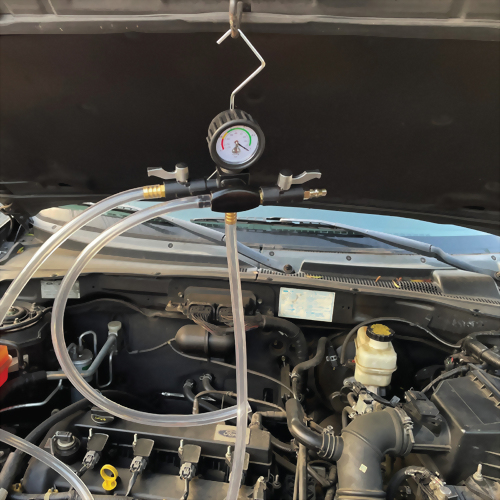
4. Set Up the Vacuum Coolant Refill Tool:
- Attach the Tool: Connect the vacuum coolant refill tool to the radiator or coolant reservoir.
- Connect to Air Supply: If your tool requires it, connect the tool to an air compressor.
5. Create a Vacuum:
- Start the Vacuum Process: Follow the instructions for your specific tool to create a vacuum in the cooling system. This typically involves opening a valve and allowing the tool to draw out air and remaining coolant from the system.
- Monitor the Gauge: Watch the vacuum gauge to ensure a proper vacuum is achieved. This may take a few minutes.
6. Check for Leaks:
- Hold the Vacuum: Once the vacuum is achieved, close the valve and observe the gauge. If the vacuum holds steady for a few minutes, it indicates there are no leaks in the system. If the vacuum drops, there may be a leak that needs to be addressed before proceeding.
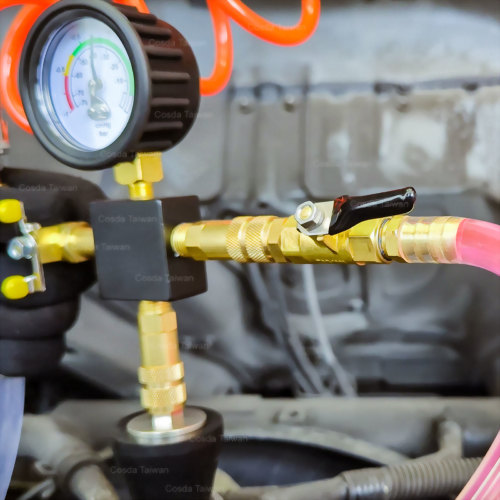
7. Refill the Coolant:
- Prepare Coolant Mix: If using concentrated coolant, mix it with distilled water according to the manufacturer’s instructions.
- Use the Vacuum Tool: Open the valve on the vacuum tool to allow the new coolant to be drawn into the system. The vacuum will pull the coolant into the radiator and through the entire cooling system, effectively eliminating air pockets.
8. Check Coolant Level:
- Top Off: Once the system is filled, check the coolant level in the radiator and overflow reservoir. Top off if necessary.
- Reinstall Cap: Replace the radiator cap securely.
9. Run the Engine:
- Start the Engine: Start the engine and let it idle. Turn the heater on to the maximum temperature setting.
- Check for Leaks: Inspect for any leaks and ensure the coolant level remains steady.
- Monitor Temperature: Watch the temperature gauge to ensure the engine reaches operating temperature without overheating.
10. Dispose of Old Coolant Properly:
- Proper Disposal: Take the old coolant to a recycling center or an automotive store that accepts used coolant. Do not pour it down the drain or onto the ground.
Tips and Warnings:
- Safety First: Always wear safety glasses and gloves when handling coolant.
- Correct Coolant: Use the type of coolant specified in your vehicle’s owner’s manual.
- Regular Maintenance: Change the coolant according to your vehicle manufacturer’s recommended interval to maintain optimal engine performance and cooling efficiency.
- Avoid Overfilling: Do not overfill the radiator or overflow tank.
The vacuum method ensures that the cooling system is free of air pockets, providing optimal cooling efficiency and preventing potential engine damage due to overheating. If you are unsure about any step, consult a professional mechanic.
| Package | Blow molded case (blue) | |
| Packing | 10 sets in a master carton | |
| Weight per set | 1.4 kg | 3.1 lbs |
| Net weight per carton | 14.0 kg | 30.8 lbs |
| Gross weight per carton | 15.0 kg | 32.0 lbs |
| Size per set | 35.0 × 24.0 × 8.6 cm | 13.8 × 9.4 × 3.4 in |
| Size per carton | 49.5 × 44.5 × 36.5 cm | 19.5 × 17.5 × 14.4 in |
| Volume per carton | 0.08 CBM | 2.8 CUFT |
| Case label size | 20.0 × 7.0 cm | 7.9 × 2.8 in |

| Suggested HS code |
84818090006 |
| MOQ | 100 sets |
| Laser marking cost | + TWD 3 |


