


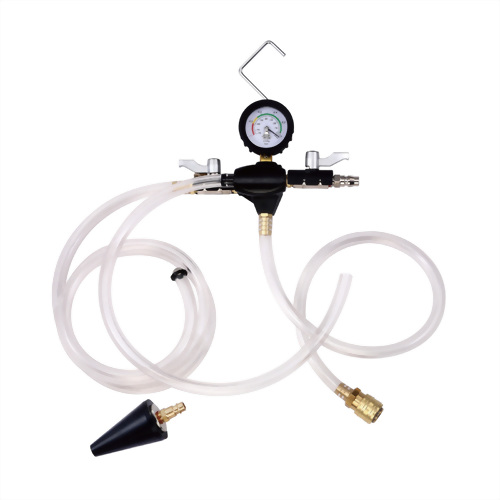
Radiator Vacuum Coolant Refill Kit for Tesla
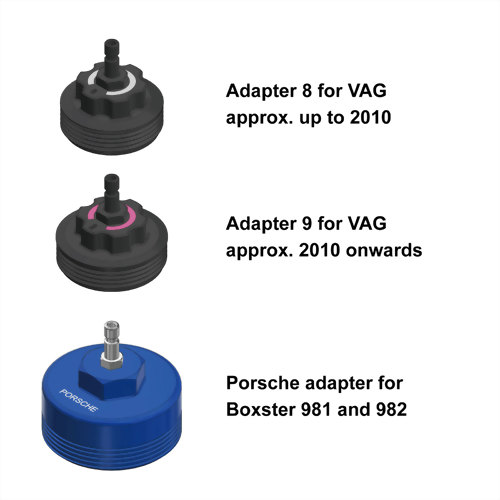
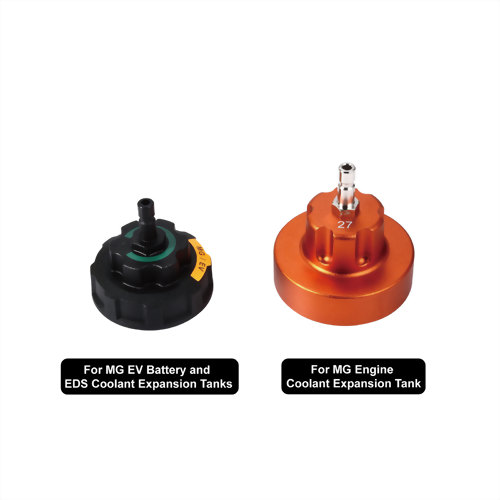
• Provided with two threaded adapters for Model S and X, and Model 3 and Y
• With only two valves - easy to use, intuitive design
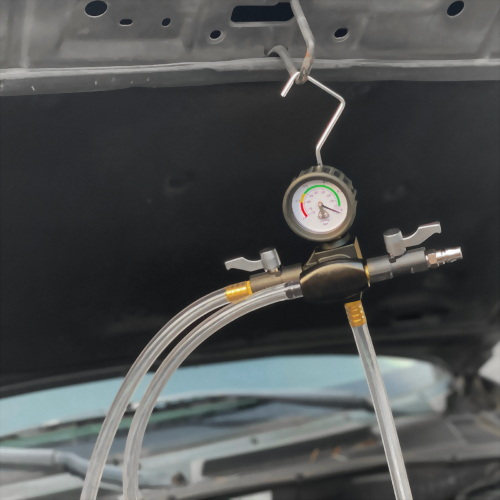
• Tool with a hook can hang under the hood
• Tool needs to work with an air compressor to create a vacuum in the cooling system


How can we change coolant on Tesla vehicles?
Changing the coolant on Tesla vehicles is a complex task, as these vehicles use a sophisticated thermal management system that regulates the temperature of various components, including the battery pack, power electronics, and electric motor. Tesla recommends having this service performed by trained professionals at an authorized service center to ensure it is done correctly and safely.
However, if you have the necessary experience and equipment, here’s a general overview of the process:
1. Safety Precautions:
- Turn Off the Vehicle: Make sure the Tesla is completely turned off and disconnect the high-voltage battery if necessary.
- Park on a Level Surface: Ensure the vehicle is on a flat surface and engage the parking brake.
- Wear Protective Gear: Use gloves and eye protection to avoid contact with the coolant, which can be harmful.
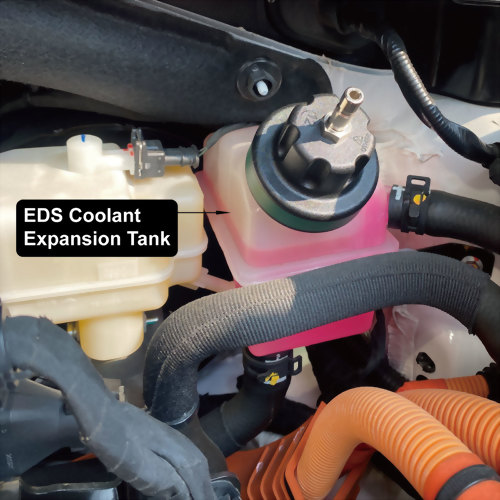
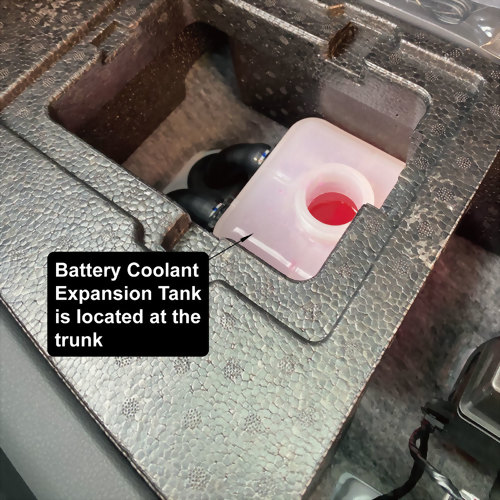
2. Access the Coolant Reservoir:
- Locate the Coolant Reservoir: The coolant reservoir is typically located in the front trunk (frunk) or under the front hood.
- Remove Any Covers: You may need to remove some covers or panels to access the coolant reservoir.
3. Drain the Coolant:
- Locate the Drain Plug: Depending on the model, you might need to remove the underbody shield or other components to access the coolant drain plug. The exact location will vary by model.
- Place a Drain Pan: Position a drain pan under the drain plug to collect the old coolant.
- Open the Drain Plug: Carefully open the drain plug and allow the coolant to drain completely. This process might take some time, as the Tesla’s thermal management system can hold a significant amount of coolant.
4. Flush the System (Optional):
- Flush with Distilled Water: If desired, you can flush the system with distilled water to remove any remaining old coolant or contaminants. Repeat the draining process until the water runs clear.
- Close the Drain Plug: Once the system is flushed, close the drain plug securely.
5. Refill the Coolant:
- Use the Correct Coolant: Tesla vehicles typically require a specific type of coolant, often a G-48 ethylene glycol-based coolant or similar. Always check the vehicle’s manual for the correct type.
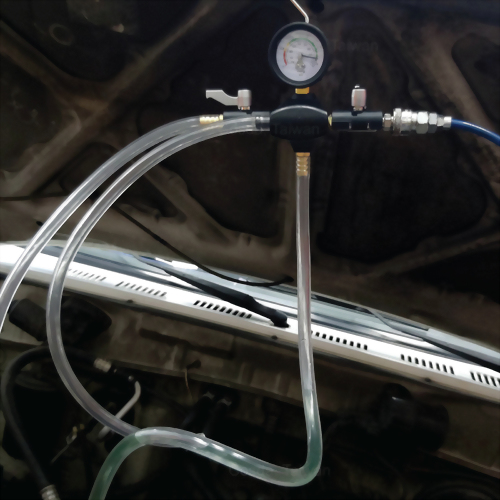
- Fill the Reservoir: Use Cosda’s SD-1294 with adapters for all Tesla models. Work with an air compressor to create a vacuum in the Tesla cooling system, and fill the coolant reservoir to the recommended level in a short time.
- Bleed the System: Tesla’s cooling system may require bleeding to remove air bubbles. This process can vary by model, so consult the vehicle’s manual or a professional service technician. Some Tesla models might have an automated bleeding process activated through the vehicle’s software. If you use Cosda’s SD-1294 to refill the coolant, then this step can be skipped.
6. Check for Leaks and Final Checks:
- Inspect for Leaks: Before closing everything up, check for any leaks around the drain plug and coolant reservoir.
- Top Off Coolant: If needed, top off the coolant to the recommended level after running the vehicle for a short period to circulate the coolant.
7. Reassemble and Test:
- Replace Covers: Reinstall any panels or covers that were removed.
- Test the System: Start the vehicle and let it run for a few minutes. Check the coolant level again and add more if necessary. Monitor the temperature and check for any error messages or issues.
Important Notes:
- Software Integration: Some Tesla models might require a software reset or special procedure to acknowledge the coolant change, which is why Tesla recommends using their service centers.
- High Voltage Considerations: Working around Tesla’s high-voltage components can be dangerous if not done properly, so this task is generally best left to trained professionals.
For most owners, the best approach is to have Tesla or an authorized service center handle the coolant change to ensure it’s done safely and correctly.
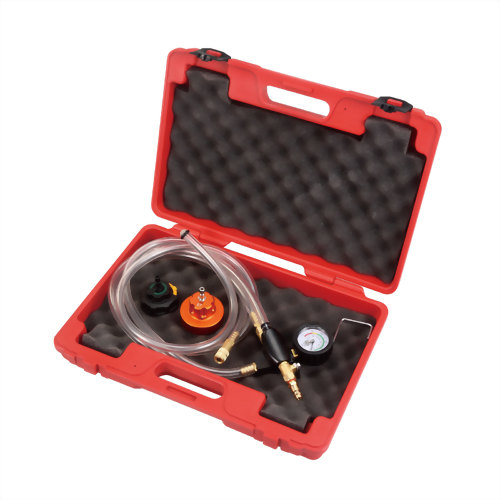
| Package | Blow molded case (red) | |
| Packing | 5 sets in a master carton | |
| Weight per set | 2.6 kg | 5.7 lbs |
| Net weight per carton | 13.0 kg | 28.6 lbs |
| Gross weight per carton | 14.0 kg | 30.8 lbs |
| Size per set | 44.7 × 32.5 × 10.7 cm | 17.6 × 12.8 × 4.2 in |
| Size per carton | 56.0 × 46.0 × 34.0 cm | 22.0 × 18.1 × 13.4 in |
| Volume per carton | 0.088 CBM | 3.1 CUFT |
| Case label size | 31.9 × 10.6 cm | 12.6 × 4.2 in |

| Make | Model No. | Year | Category | Remark |
| Tesla | Cybertruck | 2023-2024 | Radiator caps | Red aluminum cap |
| Tesla | Model 3 | 2017-2024 | Radiator caps | Red aluminum cap |
| Tesla | Model S | 2012-2024 | Radiator caps | Nylon cap |
| Tesla | Model X | 2015-2024 | Radiator caps | Nylon cap |
| Tesla | Model Y | 2020-2024 | Radiator caps | Red aluminum cap |
| No. | Image | Cosda No. | Description | |||||
|---|---|---|---|---|---|---|---|---|
| 1 |  |
SD-1291-BODY | Vacuum Type Coolant Refill Tool | More |
||||
|
- Specifications
|
||||||||
|
|
||||||||
| 2 |  |
SD-1291-26 | No. 26 Cooling System Test Cap | More |
||||
|
- Specifications
|
||||||||
|
|
||||||||
| 3 |  |
SD-1291-30 | No. 30 Cooling System Test Cap | More |
||||
|
- Specifications
|
||||||||
| Suggested HS code |
84818090006 |
| MOQ with laser marking | 40 sets |
| MOQ without laser marking | 20 sets |
| Laser marking cost | + TWD 3 on each radiator adapter |
|
Logo printing cost |
+ TWD 3 on vacuum refill tool with TWD 2,000 printing tooling cost |
| Logo printing MOQ | 100 sets |
|
Not for sale in |
China |


